How to clean grill grates for optimal summer grilling
Get your grill sparkling before the first barbecue of the season.
Products are chosen independently by our editors. Purchases made through our links may earn us a commission.
You’re preparing for your first barbecue of the grilling season. You’ve got ice in the coolers, your grilling essentials are at the ready, and you know which mistakes not to make when the big day comes.
But, is your actual grill in good shape? Maybe you haven’t used it in months. Perhaps you didn’t store it properly. Chances are the grates have developed some rust and need a deep cleaning.
To keep from serving your guests some dangerous burgers, you’ll need to clean rusty grill grates before cooking anything. (And along those lines, we recommend avoiding any wire brush, as those have been known to fall off in food and lead to health complications when swallowed.)
Don’t fret—cleaning your gas or charcoal grills is a simple process that only takes about an hour and a half—soaking included. The actual work involved? No more than 15 minutes.
Here’s how to clean a grill.
What You’ll Need:
- A grill brush
- A clean trash can
- Hot water
- 1 cup dish soap
- ¼ cup baking soda
- A towel
- Time (30 minutes or more, to soak)

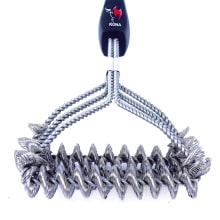
An easy to use brush that makes cleaning your grill a breeze.
Here's how to clean grill grates
1. Remove excess rust
First things first. Scrub off as much loose rust as possible with a grill cleaning brush. Before you take the cooking grates off of the grill, use a brush to scrub them, trying to remove as much rust as possible.
There’s a chance that the rust isn’t set very deep, and scrubbing will solve your problem. If you're working with stainless steel grates, avoid a steel bristle, wool, or nylon grill brush as they could scratch them. Some recommend cleaning grill grates with a ball of aluminum foil. We don’t recommend this, it could potentially damage your grill grates.
2. Remove the grill grates
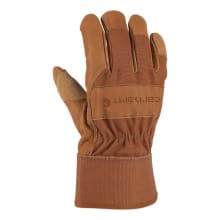
Carefully remove the grates and set them aside. If you’re worried about getting rust or debris on yours hands, you can wear work gloves here.


Unmatched durability, flexibility, and protection make these our favorite work gloves on the market.
3. Prepare the cleaning mixture
Fill the trash can or large, shallow bucket with 1 cup dish soap and ¼ cup baking soda. A trash can or large bucket will work best here, but a large, sturdy garbage bag works in a pinch. Just be careful not to spill all over yourself.
4. Submerge the grates
Place the grill grates inside, and fill with hot water until the grates are underwater. Don’t overfill with water, or the baking soda will be less effective.
5. Soak and scrub the grates
Soak the grates for one hour, and then scrub them clean with the soapy water mixture. This part could get messy. Use the same grill brush or the scratchy side of a sponge to scrub off any remaining rust or food particles. This soak is also a great step to remove grease and stuck on food bits.
6. Return the grates to the grill
Rinse the cleaned grates with cold water, dry them thoroughly, and place them back on the grill. Be sure to dry the grates completely to prevent more rusting.
7. Season and heat the grill
Like a cast iron pan, your grill’s cooking surface is going to become more nonstick, resistant to rust, and better all around the more you season it.
Dip some paper towels in cooking oil and rub on your grill grates. Crank your grill to high heat to lock in the seasoning. Finally, let your grill cool down before cooking again.
8. Enjoy grilling!
Your grill is now ready for your first barbecue of the season. To prevent future rust, make sure to fully clean your grill after each use. Always reseason the grill when possible.
Cover and store during any bad weather to keep those grates clean. Also, take extra care to clean and dry cast iron grill grates each time!
Cleaning not enough to salvage your grill? Check out our roundup of the best grills on the market.


